How to Paint a Wooden Bed Frame..………Note: Sob Story

bedframe
I’m not as active on Olive and Love because I’m focusing my extra time and energy on pursing my education and exploration of encaustic fine art.
Please check it out and let me know what you think!

I've been searching for the perfect bed frame for my room for years. Craigslist, consignment, thrift stores.... I think part of my problem is not knowing exactly what I want. I do know that we want a comfortable headboard, a side rail, and preferably a foot board to keep the duvet from falling off. Well two weeks ago my search came to an end (or so I thought).

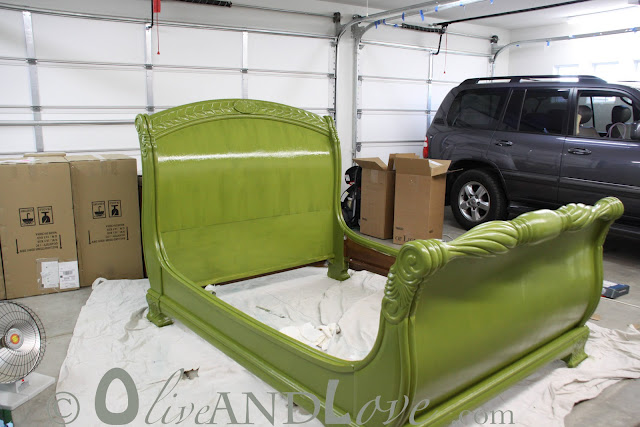
A massive sleigh bed was listed on Craigslist:

PERFECT! Using a 2 inch angled brush with tapered bristles, I applied two coats of primer. Zinsser Primer is some serious stuff and from experience (my own and others) you don't need to sand first. I would, however, recommend using a tinted primer.


It doesn't take long to dry so by the time the first coat was finished I moved right on into the second. Each coat took about 3 hours. I worked one evening and part of a morning. Even the inside of my car was stinky for like three days. Next I took to it with a 275 fine grain sand paper, feeling it with my hands as I sanded to be sure it was smooth.

Setting my kids up with some painting projects of their own, I got to work on coat one. Then coat two. Then three and four and yes.....parts had a coat five.
I used a one and a half inch tapered angled brush and a three inch brush, depending on the area I was painting. Using long strokes, pulling my arm up away from the bed in an arc form, I applied Martha Stewart Okra in gloss.

With this type of painting, there was minimal visible brush strokes. In between coats I covered my brushes in plastic wrap.

After coat three you could still detect the white primer showing through. Four coats pretty much covered the entire thing but I was in love with this olive bed you see...(Olive and Love?), so I wanted it perfect.

I painted the bed assembled so I needed to do some touch up on the connecting pieces to be sure none of the original wood would show.
[googlead]

Finished? Not yet....In the above picture you can see the difference a high gloss polyurethane makes. I wanted as protection on the bed from nicks and because I was digging the glossy finish. One coat total of poly and I let the bed dry for two days.

Unfortunately in the above picture, the finish looks uneven because it is still wet. At this point I thought I would have an opportunity to take the "After" picture in my room.
The following are the only two pictures I have of the bed in my room before realizing that it was in fact NOT a cal-king, but a queen. There are not any queens in my house (besides me). There fore I am now out quite a chunk of change and about thirty hours of my life. Can you tell I'm still a little sore on the subject? When I first realized it was for sure a queen for I layed down on my pile of blankets and pillows I had taken off my bed and sobbed. My husband Dan lay down with me and rubbed my back.


Now what to do with this queen bed? Well let me know if you are interested because it is in fact for sale. Everything happens for a reason right? Perhaps this bed is the beginning of my new line of furniture. Meanwhile my mattress is on the floor in my room and my quest continues...
UPDATE:
Bed is waiting for you to buy it. Please contact me.

20130109-IMG_4575
This post is linked to the following parties:


